MANGA for novices-drawing eyes
![]()
MANGA for novices-drawing eyes
![]()
Here we are trying to draw the most important thing on a character, it's eyes. Make sure your hand isn't dirty(the paper then becomes dirty too),
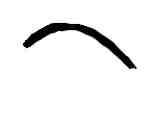
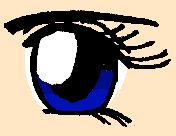
and your pencil is sharp(drawing eyes is pecision work). We have three differrent views when drawing the face(this means eyes included), the front view, the 3/4 view and the side view. We too have different styles of drawing eyes and the eyes can have diffrent expessions.First we'll begin with the basic(simplest) manga eye you see in nearly every comicbook. The expression will be neutral and we'll draw it from the front view. So, here you've got a picture how it should look when it's finished.
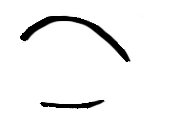
The bottom eye line defines the "legth" of an eye. Putting the line too far down will make the character's eyes look like those from Pokemon and vice versa. 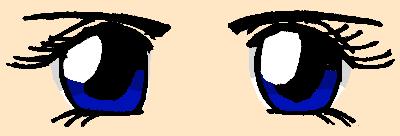
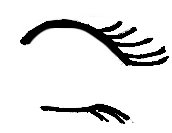
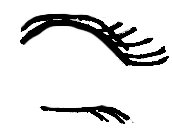
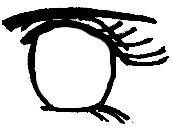
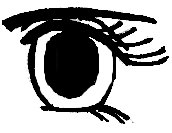
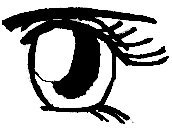
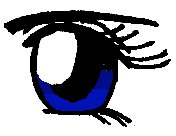
Lets draw the left eye first. We'll start with the upper eye line. It's usual that the end of the line turned to the nose is higher than the opposite end(this of course isn't a rule for every eye type, there are exceptions but we'll discuss that in the beginners section). Draw every line first softly, this will make erasing easier.Now we can continue by drawing the eyelashes. The eyelashes often define the sex of a character's eyes. Long eyelashes mean it'll be a woman and vice versa. Every eye should have form 3 to 6 or 7 eyelashes or it'll look like having wings.Don't forget the bottom eyelashes. They're a bit shorter. No kids, we're not going to draw the iris now. the next thing to draw is a thin line above the upper eye line. It's where the skin above the eye folds. It follows the upper eye line. The next thing to draw is the eyebrow. It defines a characters mod and feeling. Eyebrows are differernt for women and men. Women eyebrows are much thinner than those of men. Sometimes they are represented(when drawing the eye quickly) by one or two lines. O.k. kids, now we get to the iris. The iris is the most important thing on an eye. She's the thing that looks out of the picture and it needs much practice to draw it nice. We'll begin with the outer iris circle. Maybe it should be better called elipsoid, because she's usualy squashed a little bit horizontaly(make sure not to squash her too much or she'll look like a spagheti). Now we'll put into the middle of the iris the apple. It has about the same shape as the iris. There's something missin' don't you think? It's the reflction! It's usualy placed in the left upper corner of the iris. It can also be in the other three corners, depending on from where the light falling on the face comes. We can now begin coloring the image. The best way is to scan the image from the paper and the coloring will be done on some of the good programes(Not microsoft paint of course! Something like Photoshop or Paintshop Pro). Think first what color will the iris be. We'll choose the clasic blue eye. Now we'll split the iris verticaly into three sections(there aren't any proportions you need to follow). The top section will be black(the shadow of the upper eye line). Then the second deep blue section comes (representing the shadow of the eyebrow) and at the bottom is the third section in blue(this is the normal iris color without shadows). Then we'll add the color of the skin. Make sure to let a thin white strip on both sides of the iris. Now we'll add to the upper part of thin white strips a light grey color (representing the shadow of the eyebrow). By adding the second eye we're done, but. When practicing drawing the eyes, draw both of them. Else it could happen that you can't copy the first eye in a mirror form and the second eye would look completely diffrent than the first. Also a problem can sometimes become the lineup of both eyes. It could happen that the eyes are in different height. When you got this problem, try to use a ruller, it helps. Well, we've learend how to draw eyes, but! Only how to draw them from the front view and only in a neutral mod. But now I'll correct it and teach you how to draw the eyes from 3/4 view.
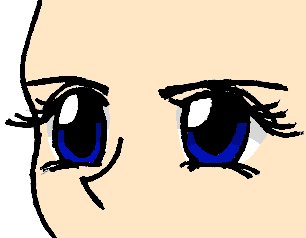
Here we've got a picture of the final drawing.I've added a part of the face to strengthen the 3/4 look of the eyes.
As you can already see the right eye is nearly simmilar to the eyes from the front view(the only difference is that small eyelashes are also on the side turned to the nose-that's only to not make it look like from front view). But the left eye is squashed horizontaly. That is because the eyes are "flat" and they are somehow "sticked" onto the surface of the face. The left eye hasn't got eyebrows on the side turned to the nose.Now we get to drawing the different moods visible on the eye. There are three basic moods of the eyes:happiness, anger and a look that can be described as surprised(in both a good and bad way, depends on the rest of the face).
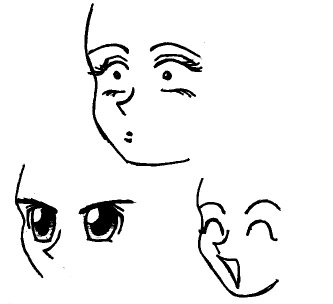
The first expression is surprise. The iris is very small(sometimes she's represented by a dot). The eyebrows are lifted.
The second expression(bottom left) is anger. The eyebrows are pushed down. They cover a part of the eyes(this defines the level of anger-we'll discuss that too in the beginners section).
The third expression is happiness. The eyes are represented by an upside down U with one eyelash on each side. The eyebrows are lifted and bend down.Go back
Go to eyes for Beginners